Features of Laravel 9 : What is new in Laravel 9
Laravel Contracts Example | Contracts In Laravel In Hindi
Understanding Laravel Dependency Injection | Dependency Injection In Laravel In Hindi
How to setup MongoDB In Laravel : Laravel with MongoDB
Laravel echo, socket io and redis with example : Laravel socket io with redis
Linux traceroute Command : traceroute Command In Linux
Best Keyboards Under 1000 Available On Amazon
Prmise.all() Vs Promise.allSettled() | JS allSettled() Example
If tutorials available on this website are helpful for you, please whitelist this website in your ad blocker😭 or Donate to help us ❤️ pay for the web hosting to keep the website running.
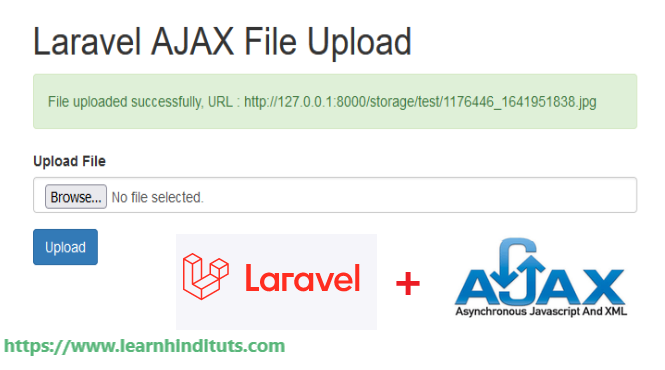
Laravel AJAX File Upload
इस topic में आप सीखेंगे कि laravel में AJAX के through file को कैसे upload करते हैं। तो सबसे पहले एक fresh laravel project install करते हैं।
composer create-project --prefer-dist laravel/laravel laravel8test
ये command run करते ही laravel 8 project install हो जायगा अब , हमें file को access करने के लिए link बनानी होगी।
local storage , मतलब अपने project में ही upload कर सकते हैं।
local storage , मतलब अपने project में ही upload कर सकते हैं।
external storage जैसे AWS.
by default , जब आप file को access करेंगे तो , वह public/storage folder को locate करता है , जबकि हम अपनी files को storage/app/public के अंदर रखते हैं। storage/app/public folder से files को access करने के लिए हमें एक symbolink link बनानी बढ़ती है। link बनाने के लिए simply run करें।
php artisan storage:link
ये command public/storage से storage/app/public link create कर देगी , जिससे आप file को access कर सकें। file upload करने के लिए storage का use करते हैं , example में हमें public storage का use किया है। अगर आप disk configuration करना चाहते हैं तो config/filesystem.php open करके देखे सकते हैं।
<?php

return [

    /*
    |--------------------------------------------------------------------------
    | Default Filesystem Disk
    |--------------------------------------------------------------------------
    |
    | Here you may specify the default filesystem disk that should be used
    | by the framework. The "local" disk, as well as a variety of cloud
    | based disks are available to your application. Just store away!
    |
    */

    'default' => env('FILESYSTEM_DRIVER', 'local'),

    /*
    |--------------------------------------------------------------------------
    | Filesystem Disks
    |--------------------------------------------------------------------------
    |
    | Here you may configure as many filesystem "disks" as you wish, and you
    | may even configure multiple disks of the same driver. Defaults have
    | been setup for each driver as an example of the required options.
    |
    | Supported Drivers: "local", "ftp", "sftp", "s3"
    |
    */

    'disks' => [

        'local' => [
            'driver' => 'local',
            'root' => storage_path('app'),
        ],

        'public' => [
            'driver' => 'local',
            'root' => storage_path('app/public'),
            'url' => env('APP_URL').'/storage',
            'visibility' => 'public',
        ],

        's3' => [
            'driver' => 's3',
            'key' => env('AWS_ACCESS_KEY_ID'),
            'secret' => env('AWS_SECRET_ACCESS_KEY'),
            'region' => env('AWS_DEFAULT_REGION'),
            'bucket' => env('AWS_BUCKET'),
            'url' => env('AWS_URL'),
            'endpoint' => env('AWS_ENDPOINT'),
            'use_path_style_endpoint' => env('AWS_USE_PATH_STYLE_ENDPOINT', false),
        ],

    ],

    /*
    |--------------------------------------------------------------------------
    | Symbolic Links
    |--------------------------------------------------------------------------
    |
    | Here you may configure the symbolic links that will be created when the
    | `storage:link` Artisan command is executed. The array keys should be
    | the locations of the links and the values should be their targets.
    |
    */

    'links' => [
        public_path('storage') => storage_path('app/public'),
    ],

];अब routes/web.php में routes add करते हैं।
// Routes to upload file
Route::get('upload-file', function () {
    return view('upload-file');
});

Route::post('upload-file', [App\Http\Controllers\FileController::class, 'upload_file'])->name('upload-file');इसके बाद resources/views folder में upload-file.blade.php name की file बनाएं और ये content रख दें।
<!DOCTYPE html>
<html lang="en">
<head>
<title>Laravel AJAX File Upload</title>
<meta charset="utf-8">
<meta name="viewport" content="width=device-width, initial-scale=1">
<link rel="stylesheet" href="https://maxcdn.bootstrapcdn.com/bootstrap/3.4.1/css/bootstrap.min.css">
<script src="https://ajax.googleapis.com/ajax/libs/jquery/3.5.1/jquery.min.js"></script>
<script src="https://maxcdn.bootstrapcdn.com/bootstrap/3.4.1/js/bootstrap.min.js"></script>
</head>
<body>
<div class="container-fluid">
<div class="row d-flex justify-content-center flex-nowrap">
<div class="col-sm-6 col-sm-push-3">
<div class="card">
<div class="card-header">
<h1 class="cread-title">Laravel AJAX File Upload</h1>
</div>
<div class="card-body">
<form method="post" action="{{route("upload-file")}}" enctype="multipart/form-data" id="upload_form">
<div class="form_process_info" role="alert"><p class="alert"></p></div>
@csrf
<div class="form-group">
<label for="myfile">Upload File</label>
<input id="myfile" class="form-control" type="file" name="myfile">
</div><br>
<div class="form-group">
<button class="btn btn-primary" type="submit">Upload</button>
</button>
</form>
</div>
</div>
</div>
</div>
</div>
<script>
$(function(){
/*
* submit form using AJAX
*/<br>
$('.form_process_info').hide();
$('#upload_form').submit(function (event) {
event.preventDefault();<br>
let form = $(this);<br>
let form_data = new FormData(this);
let submit_url = form.attr('action');
let ajax_message = form.find('.form_process_info');
ajax_message.show();<br>
ajax_message.children('p')
.removeClass('alert-success')
.removeClass('alert-danger')
.addClass('alert-info')
.text('Please wait while erquest is processing.');
/* now send ajax request */
$.ajax({
url: submit_url,
type: 'post',
data: form_data,
dataType: 'json',
processData: false,
contentType: false,
async: false,
success: function (response, res_status, xhr) {
/* reset form*/
form.trigger("reset");
ajax_message.children('p')
.removeClass('alert-info')
.removeClass('alert-danger')
.addClass('alert-success')
.text(response.message);
}
})
.fail(function () {
ajax_message.children('p')
.removeClass('alert-danger')
.removeClass('alert-success')
.addClass('alert-info')
.text('look like there is any server error , try after some time !.');
});
});
});
</script>
</body>
</html>अब एक FileControlller बनाते हैं , जिसमे upload_file() method में public disk का use करके file को upload करेंगे।
<?php
namespace App\Http\Controllers;
use Illuminate\Http\Request;
use Illuminate\Support\Facades\Storage;
class FileController extends Controller
{
/**
* Function to upload file
* @param Illuminate\Http\Request $request
* @return back
*/
public function upload_file(Request $request)
{
$file = $request->file('myfile');
//get extension to change image name
$extension = $file->getClientOriginalExtension();
$folderName = 'test/';
$new_img_name = rand(10000, 9999999) . '_' . time() . '.' . $extension;
//finally uplaod using public disk
Storage::disk('public')->putFileAs($folderName, $file, $new_img_name);
return response()->json([
"success" => true,
"message" => "File uploaded successfully",
"url" => url("storage/test/".$new_img_name)
]);
}
}
इसके बाद php artisan migrate command run करें और http://127.0.0.1:8000/upload-file URL को locate करें।
I Hope, आपको Laravel में File uploading example समझ में आया होगा।
Loading ...

Hi ! I'm Rahul Kumar Rajput founder of learnhindituts.com. I'm a software developer having more than 4 years of experience. I love to talk about programming as well as writing technical tutorials and blogs that can help to others. I'm here to help you navigate the coding cosmos and turn your ideas into reality, keep coding, keep learning :)
Get connected with me. :) LinkedIn Twitter Instagram Facebook